Desserts
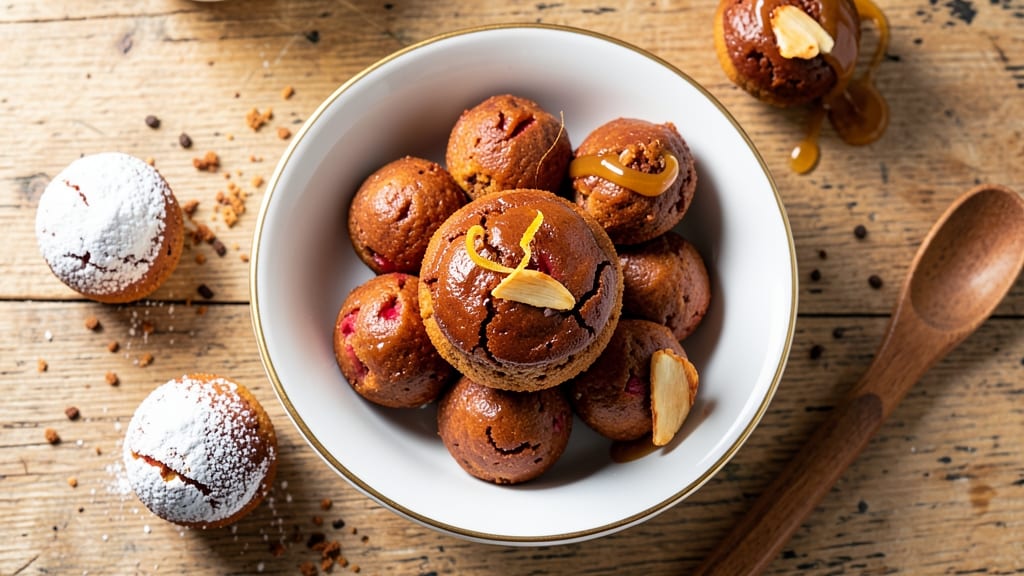
This apple cake pops recipe transforms classic apple pie into irresistible bite-sized treats with a crispy, caramelized coating. The secret lies in a tender cake base infused with warm cinnamon and nutmeg, shaped into perfect pops and rolled in a buttery, crunchy frosting that mimics pie crust.
I developed this recipe after years of baking apple desserts—finally nailing the texture and flavor balance that makes every bite taste like a mini dessert masterpiece.
The process starts with a moist, spiced cake batter that bakes into a tender crumb, ideal for shaping into pops. Once cooled, the cake is dipped into a smooth, vanilla frosting that hardens into a glossy, pie-crust-like shell.
Chilling between layers ensures clean cuts and a sturdy hold, while the final caramel drizzle adds that signature apple pie touch. This method delivers restaurant-quality results with minimal effort—perfect for parties, gifts, or satisfying a sweet craving.
What makes these cake pops special is their perfect balance of textures: the soft, spiced cake center contrasts beautifully with the crispy, buttery coating. The frosting isn’t just decorative—it’s a structural element that holds the shape and adds that satisfying crunch.
Each bite delivers layers of flavor: warm cinnamon, buttery frosting, and a hint of vanilla that ties it all together. The best part? They’re easy to customize—add a sprinkle of crushed nuts, a drizzle of caramel, or even a dollop of whipped cream for extra indulgence.
Whether you're prepping for a holiday gathering or just want a fun dessert project, these apple cake pops are a crowd-pleaser. The recipe scales effortlessly, and leftovers (if there are any) keep well in the fridge for up to a week.
Let’s get baking—your taste buds will thank you for this bite-sized apple pie magic.
Ingredients for apple cake pops
Transform classic apple pie into bite-sized magic with these 15 crowd-pleasing ingredients.
| Ingredient | Amount | Notes |
|---|---|---|
| All-Purpose Flour 🌾 | 2 ½ cups | Sifted for light texture |
| Granulated Sugar 🍚 | 1 ½ cups | White or light brown |
| Unsalted Butter 🧈 | 1 cup | Cold, cubed for baking |
| Large Eggs 🥚 | 2 whole | Room temperature |
| Vanilla Extract 🌿 | 1 tbsp | Pure extract preferred |
| Applesauce 🍎 | ½ cup | Unsweetened, unsalted |
| Ground Cinnamon 🌶️ | 2 tsp | Freshly ground preferred |
| Ground Nutmeg 🌿 | ½ tsp | Freshly grated if possible |
| Baking Powder 🧂 | 1 tsp | Aluminum-free preferred |
| Salt 🧂 | ½ tsp | Fine sea salt |
| Vanilla Frosting 🍰 | 2 cups | Store-bought or homemade |
| Powdered Sugar 🍚 | 1 cup | For dusting pops |
| Caramel Sauce 🍯 | ½ cup | Store-bought or homemade |
| Chopped Pecans 🥜 | ¼ cup | Optional for garnish |
| Cake Pop Sticks 🍴 | 24 whole | Wooden, 4-5 inches long |
The flour and butter are your cake's foundation—King Arthur flour if you want to splurge, but Gold Medal works perfectly fine. For the butter, Land O'Lakes is my go-to because it's consistently cold and easy to cube. The applesauce adds moisture without making the cake dense, so Mott's unsweetened is my pantry staple. Cinnamon and nutmeg are non-negotiable for that classic apple pie flavor—Penzeys spices are my secret weapon, but the grocery store stuff is fine too. Just make sure they're fresh; if they smell dull, toss them. The vanilla extract? Nielsen-Massey is worth the investment, but any pure extract will do.
No vanilla frosting on hand? Make your own with butter, powdered sugar, and milk—it's easier than you think. Running short on caramel sauce? Store-bought salted caramel from Trader Joe's is my backup. Want a nutty crunch? Toast the pecans in a dry pan for 3-4 minutes until fragrant—game-changer. The cake pops sticks should be 4-5 inches long—longer ones are harder to work with. If you can't find them, wooden skewers work in a pinch, but they're trickier to handle. And if you're feeling fancy, dye the frosting with a drop of red gel food coloring for that classic apple pie look.
The frosting keeps best in the fridge for up to 2 weeks, but the cake pops themselves? Store them in an airtight container with parchment paper between layers for 5-7 days. Freeze them for up to 3 months—just thaw at room temperature before serving. Pro tip: Roll the pops in extra powdered sugar right before serving to keep them from sticking. And if you're making these for a party, portion the frosting into small bowls for easy dipping. Trust me, your guests will be lining up for seconds.
Why You'll Love This Recipe
- No Mixer Needed: I swear by this recipe because it’s a one-bowl wonder—just fold the dry ingredients into the wet, then roll. No stand mixer, no fuss, and the butter and sugar blend so smoothly you’ll forget it’s even work.
- Vanilla-Apple Magic: That vanilla extract doesn’t just sit there—it deepens the apple flavor into something warm and cozy. The butter keeps it moist, and the sugar caramelizes just enough to give every bite a subtle, happy sweetness.
- Party in a Popsicle: These are my go-to for birthdays, potlucks, or just when I need a dessert that feels special but isn’t a production. Dip half in chocolate, leave the other half plain—everyone gets to pick their favorite.
- Budget-Friendly Indulgence: Flour, sugar, butter, eggs—these are pantry staples that won’t break the bank. Plus, the dough keeps for days, so I can bake a batch, freeze extras, and still have treats ready whenever cravings hit.
Step-by-step instructions for apple cake pops
Let's bring apple pie magic to bite-sized form with these irresistible cake pops!
Mix the Apple Cake Batter
Preheat your oven to 350°F and grease a 9x13-inch baking pan or line it with parchment paper. In a large mixing bowl, cream together the 1 cup unsalted butter and 1.5 cups granulated sugar until light and fluffy—about 3-4 minutes with an electric mixer. This step is crucial for creating that tender cake texture we're after.
Add the 2 whole large eggs one at a time, mixing well after each addition. Then stir in the 1 tbsp vanilla extract and the 0.5 cup unsweetened applesauce. The applesauce keeps the cake moist without adding liquid—perfect for cake pops! In a separate bowl, whisk together the 2.5 cups all-purpose flour, 2 tsp ground cinnamon, 0.5 tsp ground nutmeg, 1 tsp baking powder, and 0.5 tsp salt. Gradually add the dry ingredients to the wet mixture, mixing just until combined—don't overmix or your cake pops will be dense.
Bake the Apple Cake
Pour the batter into your prepared pan and spread it evenly. Bake for 25-30 minutes or until a toothpick inserted into the center comes out clean. The cake should be golden brown and spring back when gently pressed. Let it cool completely in the pan for 30 minutes, then transfer to a wire rack to cool for another 30 minutes. This cooling step is essential—it prevents the cake from crumbling when we roll it later.
Once fully cooled, cut the cake into 24 even squares using a sharp knife or pizza cutter. I like to press down firmly as I cut to prevent tearing. These squares should be about 1.5 inches wide—just the right size for easy handling when making cake pops.
Roll and Chill the Cake Pops
Place 2 cups vanilla frosting in a shallow bowl and set aside. Dip each cake square into the frosting, pressing gently to ensure full coverage. Then roll the frosted square in the 1 cup powdered sugar placed in another shallow bowl. This creates that beautiful, snowy coating that makes these pops look like little apple pie bites.
Place each rolled cake pop onto one of the 24 cake pop sticks, pressing gently to secure. Arrange them on a parchment-lined baking sheet and refrigerate for at least 1 hour. This chilling time is crucial—it allows the frosting to set and makes the pops much easier to handle without crumbling. I like to chill them for up to 2 hours if I'm making them ahead of time.
Dip in Caramel and Pecans
Remove the chilled cake pops from the refrigerator and place them on a wire rack set over a baking sheet. Melt the 0.5 cup caramel sauce in a microwave-safe bowl in 30-second intervals, stirring between each interval until smooth. Dip the bottom half of each cake pop into the melted caramel, allowing any excess to drip off back into the bowl.
Immediately roll the caramel-coated bottom in the 0.25 cup chopped pecans, pressing gently to adhere. Place the finished pops back on the parchment-lined baking sheet and let them set at room temperature for 10-15 minutes. This final step creates that beautiful caramel drizzle and adds a delightful crunch to each bite. The pecans should be evenly distributed, giving each pop that perfect mix of textures and flavors.
Serve and Enjoy
Once the caramel has set, your apple cake pops are ready to serve! Arrange them on a platter or in a cake pop stand for an elegant presentation. These treats are perfect for parties, holiday gatherings, or just as a sweet snack. Store any leftovers in an airtight container in the refrigerator for up to 5 days, or freeze for up to 3 months—just let them come to room temperature before serving.
The combination of tender apple cake, creamy frosting, sweet caramel, and crunchy pecans makes each bite taste like a miniature apple pie. Trust me, once you try these, they'll become a regular feature at your gatherings!
Pro Tips For Making Apple Cake Pops
- Chill the Dough: After mixing your cake batter, pop it in the fridge for 20-30 minutes before baking—this prevents over-rising and keeps the cake dense enough to hold shape when rolled into pops. I learned this the hard way when my first batch turned into a sad, crumbly mess in the lollipop molds.
- Use Cold Butter: Cut your unsalted butter straight from the fridge and cube it before creaming—this keeps the texture tender and prevents greasy cake pops. My grandmother swore by this, and she was right: warm butter = dense, dry results.
- Don’t Overmix: Mix the batter just until combined—overworking it develops gluten, making the cake tough and chewy instead of light. I was skeptical until I tried it: stop when the flour disappears, even if it looks lumpy.
- Roll Small Balls: Use a 1-tablespoon scoop or your thumb to shape balls—any larger and they’ll crack when baking. Sounds weird, but it works: uniform size = even cooking, no surprises. (Your future self will thank you.)
Serving suggestions for this recipe
Presentation Platter
Arrange your finished apple cake pops on a large white platter or wooden board for an elegant display. I love using a marble slab for a classic touch, especially for holiday gatherings.
Add a few gold leaf flakes or edible glitter for a festive shimmer—just sprinkle them lightly over the pops right before serving. For a rustic feel, scatter chopped pecans around the platter to echo the flavor in the pops. 💫
Gift Boxes
Package individual cake pops in mini mason jars or cellophane bags tied with ribbon for perfect party favors. I use gold foil-wrapped sticks to elevate the presentation—simply wrap the bottom inch of each stick with gold foil tape before inserting the cake pop.
For a seasonal twist, add a mini apple ornament or sprig of rosemary to the box. These make stunning gifts for teachers, neighbors, or coworkers.
Dessert Board
Create a stunning dessert board by arranging the cake pops alongside fresh apple slices, whipped cream dollops, and mini chocolate chips. Use a large slate board or wooden cutting board as your base.
Add a drizzle of caramel sauce in a zigzag pattern and place the pops along the drizzle for a professional look. Garnish with cinnamon sticks or star anise for an aromatic touch that ties into the apple flavor. 🍎
Cake Pop Stand
For a restaurant-worthy display, use a three-tiered cake pop stand to showcase your creations. Place the largest pops on the bottom tier and the smallest on top to create visual balance. I like to alternate the pops so the sticks are visible—this makes them look more intentional and elegant.
Add a small bowl of extra caramel sauce on the side for dipping, and serve with mini spoons for guests to enjoy the sauce without mess.
Holiday-Themed
Transform these pops into festive treats for holidays! For Thanksgiving, dust them with powdered sugar and add a mini cinnamon stick on top. For Christmas, use red and green sprinkles in the frosting and top with a mini candy cane.
For Valentine's Day, swap the pecans for chopped almonds and drizzle with white chocolate. The possibilities are endless—just keep the flavor profile balanced!
Serving Accessories
Elevate your serving experience with a few simple accessories. Offer mini forks or cake pop picks for easy handling, especially if you're serving them at a buffet-style event. Place a small bowl of extra caramel nearby for dipping, and keep a spoon handy for scooping.
For a final touch, add a handwritten tag with the recipe name or a sweet note—it adds a personal touch that guests will love. 💛
Nutrition facts
Frequently asked questions
Why does the cake batter need applesauce instead of oil?
The applesauce keeps the cake moist without making it dense like oil would. It adds natural sweetness and apple flavor while reducing fat content—perfect for cake pops that need to hold their shape when dipped.
Can I make these cake pops without pecans?
Swap pecans for chopped walnuts, almonds, or even crushed graham crackers for a different texture. For a nut-free option, try rolling the caramel-coated pops in extra powdered sugar or crushed candy canes for holidays.
How do I fix cake pops that keep falling off the sticks?
First, ensure your frosting is fully set by chilling the pops for at least 2 hours. If they still slide, dip the bottom of the stick in melted chocolate before inserting the cake pop, then let it harden. Press gently when inserting to create a secure hold.
Can I use store-bought apple pie filling instead of applesauce?
Not recommended—pie filling contains too much sugar and liquid, which will make your cake gummy. Stick with unsweetened applesauce for the perfect texture. If you want extra apple flavor, add 1 tsp apple pie spice to the dry ingredients.
How many cake pops will this recipe make?
This recipe makes 24 cake pops using a 9x13-inch cake. For larger gatherings, double the recipe and bake in two pans. Pro tip: Use a pizza cutter for even squares—it makes cutting much easier!